

The best easy no bake protein balls recipe made with just 6 ingredients! These oatmeal energy bites are perfect for a quick snack, post-workout fuel, or a delightful treat any time of the day. They are not only simple to make but also packed with flavor and nutrients. These little bites can easily fit into a busy lifestyle, making them a great choice for various occasions.
Why You’ll Love This Recipe
- Quick Preparation: You can whip these up in just 10 minutes—no cooking required!
- Nutritious Ingredients: Packed with protein and healthy fats, they provide sustained energy.
- Customizable Flavor: You can add your favorite mix-ins like nuts or dried fruit for extra texture and taste.
- Perfect Snack for All Ages: Kids and adults alike will enjoy these tasty energy bites.
- Ideal for Meal Prep: Make a batch ahead of time and store them for quick snacks throughout the week.
Tools and Preparation
Getting ready to make your no bake protein balls is easy with the right tools. Here’s what you’ll need:
Essential Tools and Equipment
- Mixing bowl
- Rubber spatula
- Mini cookie scoop or spoon
- Wax paper
- Cookie sheet
- Ziploc bag
Importance of Each Tool
- Mixing bowl: A spacious bowl allows for easy mixing of all ingredients without spilling.
- Rubber spatula: It helps to thoroughly combine the ingredients while scraping down the sides of the bowl.
- Mini cookie scoop: Ensures uniform size for each energy ball, making them visually appealing.
Ingredients
For the Energy Balls
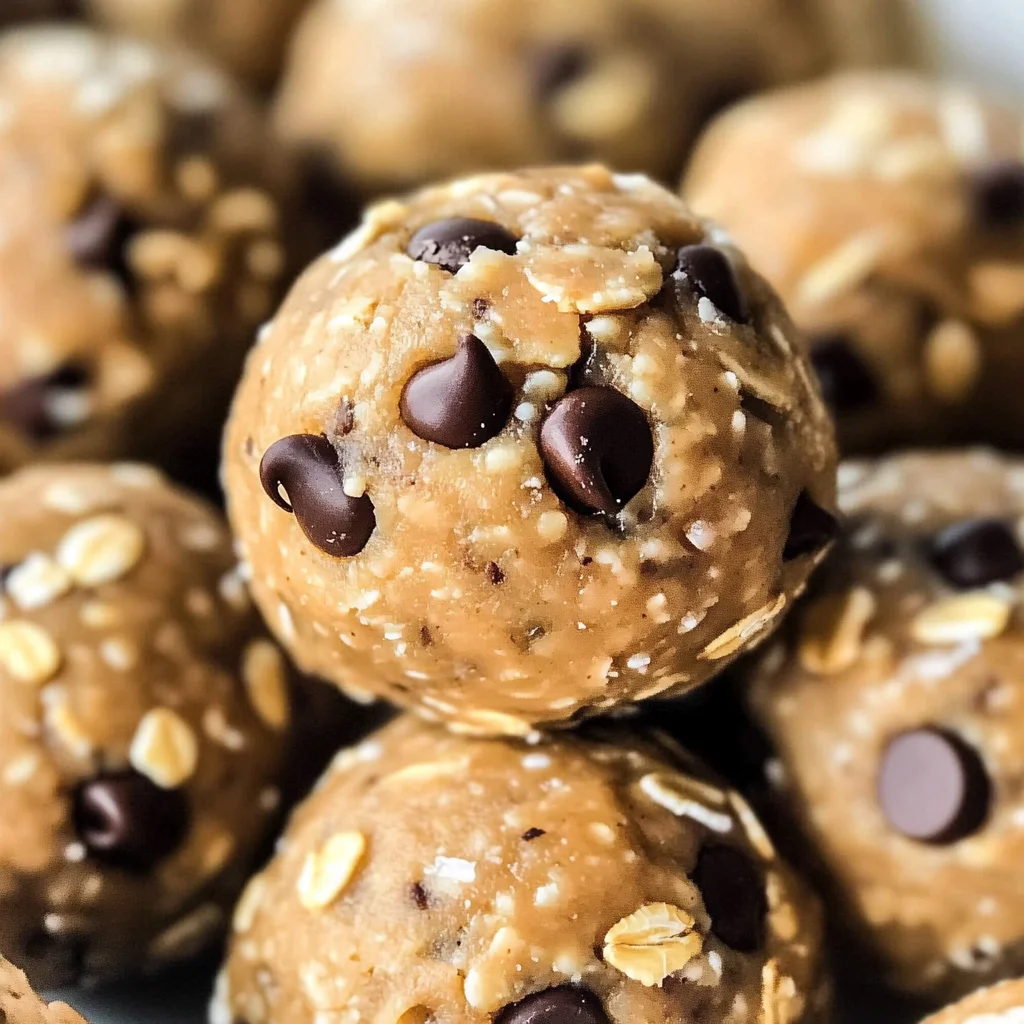
- 1 1/2 cups no stir creamy peanut butter
- 1/2 cup honey
- 1 1/3 cups old fashioned oats (rolled oats)
- 1/2 cup vanilla protein powder
- 1/8 teaspoon salt
- 1/2 cup mini chocolate chips
How to Make No Bake Protein Balls
Step 1: Combine Ingredients
Start by adding the no stir creamy peanut butter, honey, rolled oats, vanilla protein powder, salt, and mini chocolate chips into a mixing bowl. Use a rubber spatula to mix until all ingredients are well combined.
Step 2: Shape the Balls
Use a mini cookie scoop or a spoon to drop about one-inch-sized portions onto a wax paper-covered cookie sheet.
Step 3: Roll Into Shape
With clean hands, roll each portion into a ball shape. This step ensures that they hold together well.
Step 4: Chill
Place the cookie sheet with the energy balls in the fridge for about one hour or until they have hardened.
Step 5: Store
Transfer your energy balls to a Ziploc bag. Store them in the fridge for up to one week or freeze them for 2-3 months.
Step 6: Explore More Flavors
Don’t forget to check out my Energy Bites Cookbook featuring this recipe along with over 20 other flavors you’ll love!
How to Serve No Bake Protein Balls
No Bake Protein Balls are a versatile snack that can be enjoyed in many ways. Whether you need a quick energy boost before a workout or a sweet treat after dinner, these protein-packed bites are perfect for any occasion.
As a Pre-Workout Snack
- These energy balls provide the right amount of fuel to power your workouts without weighing you down.
With Fresh Fruit
- Pairing your No Bake Protein Balls with fresh fruit like apple slices or berries adds extra vitamins and fiber.
As an Afternoon Pick-Me-Up
- Enjoy them during the afternoon slump at work or school for a satisfying snack that keeps you focused.
In Smoothie Bowls
- Crumble some protein balls over smoothie bowls for added texture and flavor, making your breakfast or snack even more delightful.
As Dessert
- Serve these protein balls as a healthier dessert option after dinner. Their sweetness will satisfy your cravings without the guilt.
How to Perfect No Bake Protein Balls
To ensure your No Bake Protein Balls turn out perfectly every time, consider these simple tips.
- Use fresh ingredients: Make sure your peanut butter and oats are fresh for the best flavor and texture.
- Adjust sweetness: If you prefer less sweetness, reduce the amount of honey to suit your taste.
- Experiment with add-ins: Try adding nuts, seeds, or dried fruits to customize the flavor and nutrition profile.
- Chill for better shape: Allowing the balls to chill in the fridge helps them firm up and makes them easier to roll.
- Store properly: Keep them in an airtight container in the fridge for optimal freshness. They can also be frozen for longer storage.
- Mix thoroughly: Ensure all ingredients are well combined for consistent flavor throughout each bite.
Best Side Dishes for No Bake Protein Balls
No Bake Protein Balls pair well with various side dishes that complement their flavors and enhance your snacking experience. Here are some great options:
-
Yogurt Parfait
Layer yogurt with granola and fruits for a refreshing contrast that balances the richness of the protein balls. -
Veggie Sticks with Hummus
Crunchy carrots, celery, or bell peppers dipped in hummus make a light and nutritious side dish. -
Fruit Salad
A mix of seasonal fruits adds natural sweetness and hydration alongside the protein-rich bites. -
Nut Butter Toast
Serve whole-grain toast spread with almond or cashew butter for added healthy fats and carbs. -
Oatmeal Bowl
A warm oatmeal bowl topped with nuts or seeds complements the flavors of the protein balls perfectly. -
Rice Cakes with Avocado
Light rice cakes topped with smashed avocado provide healthy fats and fiber that contrast nicely with the sweet bites.
Common Mistakes to Avoid
When making No Bake Protein Balls, it’s easy to overlook some key steps. Here are common mistakes to watch out for:
- Using the wrong peanut butter: Make sure to use no stir creamy peanut butter for the right texture. Chunky varieties may not hold together as well.
- Skipping refrigeration: Don’t skip the chilling step! Refrigerating the energy balls helps them firm up and improves their texture.
- Overloading on ingredients: Avoid adding too many mix-ins like nuts or dried fruits, which can alter the balance and make them hard to shape.
- Not measuring ingredients: Accurate measurements are crucial for consistency. Use a measuring cup and spoons to get it right.
- Ignoring storage guidelines: Be mindful of how you store your protein balls. Improper storage can lead to spoilage or loss of texture.
Refrigerator Storage
- Store in an airtight container in the fridge for up to 1 week.
- Keep away from strong-smelling foods to maintain flavor integrity.
Freezing No Bake Protein Balls
- For long-term storage, place in a zip-top bag or airtight container.
- They can be frozen for 2-3 months without losing quality.
Reheating No Bake Protein Balls
- Oven: Preheat to 350°F (175°C) and warm for about 5-7 minutes. This will help them regain some firmness if they have softened.
- Microwave: Heat individually in short bursts of 10-15 seconds. Be cautious not to overheat, as this may change their texture.
- Stovetop: While not typical, you can briefly warm them in a covered pan on low heat, stirring gently.
Frequently Asked Questions
What are No Bake Protein Balls?
No Bake Protein Balls are energy bites made with simple ingredients like oats and peanut butter, providing a quick and healthy snack option.
How do I customize my No Bake Protein Balls?
You can customize your No Bake Protein Balls by adding different nut butters, seeds, or even swapping chocolate chips for dried fruits.
Can I use plant-based protein powder?
Yes! Feel free to use any plant-based protein powder that fits your dietary needs while making these No Bake Protein Balls.
How long do they take to prepare?
The preparation time is only about 10 minutes, making these No Bake Protein Balls a quick snack option.
Final Thoughts
These No Bake Protein Balls are not just easy to make; they’re also incredibly versatile. You can tweak the ingredients based on your preferences or what you have on hand. Whether for a quick snack or a post-workout boost, these energy bites are sure to satisfy your cravings. Give them a try and enjoy customizing your own delicious flavors!

No Bake Protein Balls
- Total Time: 10 minutes
- Yield: About 12 servings 1x
Description
Indulge in the delightful world of No Bake Protein Balls—an easy, nutritious snack that comes together in just minutes! With only six simple ingredients, these energy bites are perfect for a quick snack, post-workout recovery, or a delicious treat any time of day. Rich in protein and healthy fats, they provide sustained energy to keep you going throughout your busy lifestyle. Plus, you can customize them with your favorite add-ins, making them a versatile option for everyone. Enjoy these wholesome bites as part of your meal prep routine to ensure you always have a nutritious snack on hand!
Ingredients
- 1 1/2 cups no stir creamy peanut butter
- 1/2 cup honey
- 1 1/3 cups old-fashioned oats
- 1/2 cup vanilla protein powder
- 1/8 teaspoon salt
- 1/2 cup mini chocolate chips
Instructions
- In a mixing bowl, combine peanut butter, honey, rolled oats, protein powder, salt, and chocolate chips; mix until well combined.
- Use a mini cookie scoop or spoon to portion out one-inch balls onto a wax paper-covered cookie sheet.
- Roll each portion into a ball shape with clean hands.
- Chill the cookie sheet in the fridge for about one hour until firm.
- Store in a Ziploc bag in the fridge for up to one week or freeze for up to three months.
- Prep Time: 10 minutes
- Cook Time: 0 minutes
- Category: Snack
- Method: No Bake
- Cuisine: American
Nutrition
- Serving Size: 1 ball (30g)
- Calories: 110
- Sugar: 6g
- Sodium: 50mg
- Fat: 6g
- Saturated Fat: 1g
- Unsaturated Fat: 5g
- Trans Fat: 0g
- Carbohydrates: 12g
- Fiber: 2g
- Protein: 4g
- Cholesterol: 0mg